


Ever need to show someone exactly what’s happening on your computer screen? Whether you’re creating a tutorial or troubleshooting an issue, knowing how to screen record is an essential skill these days.
Screen recording is the act of capturing what’s going on on your screen with a quick video. It’s beneficial when you record video for work communications, school projects, and personal use. Accessible tools like Camtasia online provide a free, web-based platform for people at all experience levels.
Let’s dive into how to record your screen on any device.
What is screen recording?
Screen recording is the process of capturing everything that happens on your computer, phone, or tablet screen in real-time. It is especially useful in professional and educational settings.
Capturing video of your screen can make it easy to communicate information visually without the need for long explanations. You might use a screen recording to:
- Create instructional videos
- Demonstrate a process
- Highlight the functionality of software
- Capture a software bug or error
- Provide feedback on a project
- Deliver a presentation or share an idea
Need to show your screen?
Skip the downloads. Use Camtasia online to record your screen, camera, and microphone right in your browser for free.
Start Recording
How to record your screen on any platform
Let’s explore the steps for recording on different devices, so you can find a method that works best for your needs.
We’ll cover each device’s native tools, but it’s worth mentioning that you can use Camtasia online for more comprehensive recordings that are exportable to the desktop editor for more editing capabilities.
Windows
To record your screen on Windows 10 or 11, you can use the built-in Xbox Game Bar. Just hit Win + G to bring up the Game Bar, and then click the record button to start capturing your screen. When finished, press Windows + G again to stop recording. Your video will be saved in the Videos > Captures folder.
If you’re on Windows 11, you can also use the Snipping Tool to record your screen.
However, the Game Bar only captures one app window, not the whole desktop. For a more comprehensive recording that captures the full screen or multiple apps, use a web-based tool like Camtasia online.
macOS
macOS offers two options: the Screenshot app for quick videos and QuickTime for more control.
To record your screen on a Mac using the Screenshot app, press the Cmd + Shift + 5 buttons at once and choose between the two screen recording options.
To use the QuickTime player, go to “File” > “New Screen Recording,” and click the record button to start.
Both options have the ability to select screen regions with mic input. If you need more editing capabilities and real-time annotations, consider using a video editor like Camtasia Editor’s screen recording software.
Chromebook
To screen record on a Chromebook, press Shift + Ctrl + Show windows to open the screen capture tool. Switch to the recorder option, select whether you want to record your entire screen or a specific area, and click the start recording button.
iOS and Android
To record your screen on an iPhone or iPad, swipe down from the upper-right corner to access the Control Center. Then, tap the Screen Recording button, which is a circle icon. Your recording will start after a three-second countdown.
To record your screen on an Android device, swipe down from the top of your screen to open the Quick Settings menu. Then, tap the Screen Recorder icon, choose whether you want to record with sound, and tap Start.
We suggest rotating your phone to landscape mode for better formatting.
When to use pro tools instead of built-in recorders
Built-in tools are great for basic captures, but most lack editing, webcam overlay, and pro audio controls.
There are multiple reasons why people may want to upgrade to a pro tool:
- Editing
- Callouts
- Regular video creation
Camtasia online is a free screen recorder that allows for basic editing for a polished video every time. It’s a great alternative for people who create simple videos for work or school, especially due to its collaborative features. And it can be exported to the Camtasia Editor, where you can make further edits.
Camtasia Editor allows for contextual callouts, highly specific audio editing like background noise removal, and templates for easy, repetitive video creation.
Go from screen recording to polished video
A screen recording is just the start. Camtasia’s editor helps you add the callouts, animations, and edits you need to create a truly professional video.
Free Download
Should you include audio or a webcam in your recording?
Audio and webcam recordings are optional, but highly powerful. Audio guides your viewer, while the webcam adds a personal touch. A webcam is most helpful when the presenter’s presence improves trust or clarity of content.
Adding voice narration
Voice narration adds value for tutorials and walkthroughs by providing the viewer a step-by-step audio guide alongside the visuals. For clear, helpful audio, try the following:
- Check audio levels: Inconsistent audio levels can distract or make your video harder to follow. Camtasia Editor has extensive audio editing features like audio normalization, so you don’t have to export your audio to another tool to even out the volume.
- Use an external microphone: Most computers have a built-in microphone, but they tend to deliver low-quality sound. Investing in an external microphone that is best for video can make a dramatic impact.
- Control background noise: Recording audio in a quiet environment will limit distracting background noise, but screen recorders like Snagit and Camtasia Editor have built-in noise reduction features that are rare in built-in tools.
Using a webcam overlay
Webcam overlays bring a personal touch to your videos, but those aren’t always needed. When adding a webcam overlay, be careful not to cover up key content. Include them for:
- Longer, role-specific tutorials
- Feedback on a project
- PowerPoint presentations
- Webinars
Webcam recordings are optional for:
- Short tutorials
- Feature walkthroughs
- Software bug resolutions
Before recording a camera recording, make sure you have bright lighting that doesn’t cast awkward shadows and that your face is positioned in frame. Don’t record a shadowy forehead!
How to edit your screen recording (without being a video expert)
Even the most carefully planned and executed screen recording will benefit from some thoughtful editing. Whether it’s removing awkward pauses or emphasizing key points with visual effects, editing can help make your video look more professional. Here are some small edits that will go a long way:
- Trim pauses and mistakes: No matter how well you prepare, there will always be parts of your recording that are better left on the cutting room floor. Long pauses, repeated information, or unnecessary steps can confuse your audience or make them lose interest.
- Add annotations: Annotations and callouts are critical for guiding your audience’s attention to the most important parts of your recording. Using a screen recorder like Camtasia Editor makes it easy to add text callouts, highlights, and arrows to your screen recording to emphasize key points, clarify the steps of a process, or add additional context.
- Add cursor effects: The cursor is the unsung hero of screen recordings. It plays a vital role in helping viewers know where to look. Screen recorders like Camtasia Editor not only record your screen but also metadata. This enables you to change the size, shape, or path of your mouse cursor and add visual effects like click animations.
Camtasia Editor is ideal for timeline-based, drag-and-drop editing for everyone. Edits like cursor effects, annotations, and other additions bring clarity to your content without being a video editing pro.
Faster video creation with Rev
Make videos as easy as click, click, done! Camtasia Rev is so fast it’s like magic!
Learn More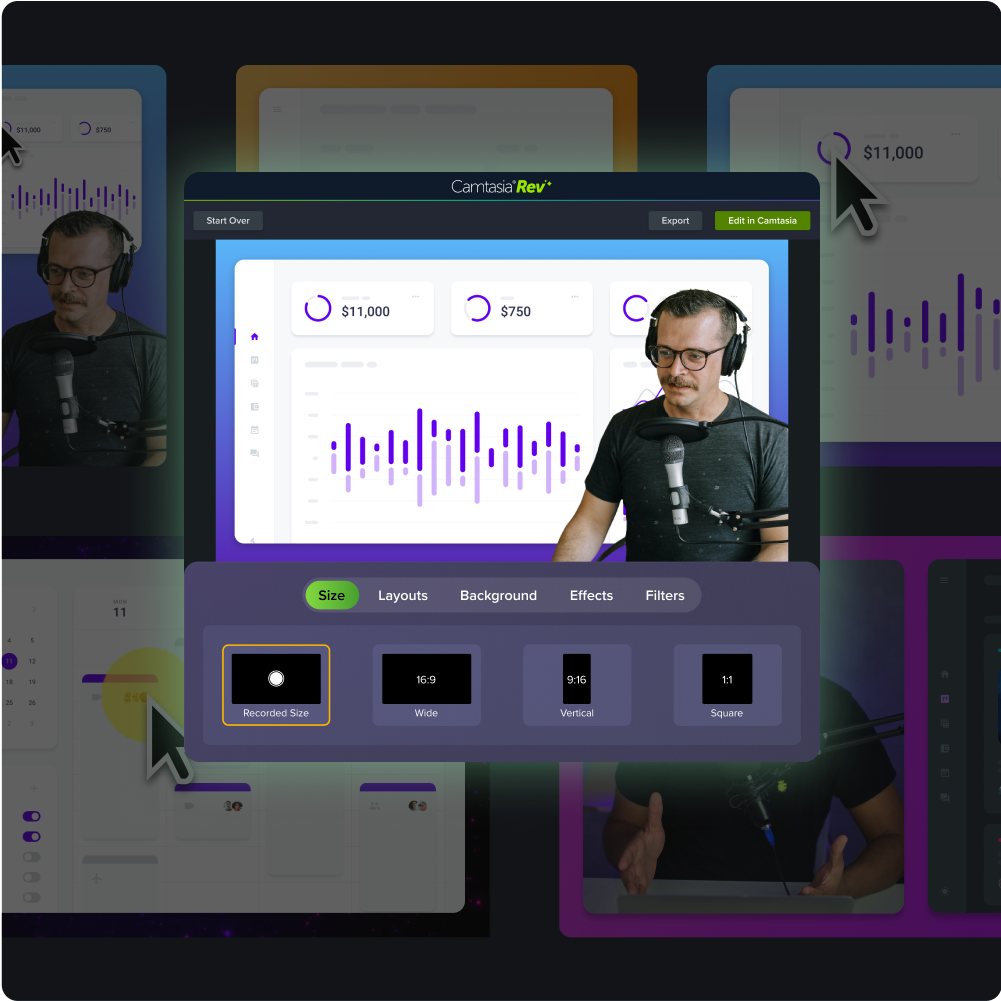
How to export and share your recording
Most video editors have similar export settings, but the most compatible option for most scenarios is MP4, 1080p, and 30 fps.
A quick, actionable way to share video is through Camtasia’s share link feature in Screencast. With the click of a button, a unique link is copied to your clipboard, which can then be pasted and shared with anyone.
Where to share your video
There are three main ways to share videos.
Internal tools: learning management systems (LMS) like SharePoint and OneDrive support video uploads and organization, best for your team.
Public platforms: YouTube or other social media and client links support video uploads, best for external audiences.
Quick-share options: unique video links provide a passphrase-protected way to share video with anyone without uploads, best for quick communications. Use screencasting to securely share your video with anyone at any time.
Common mistakes to avoid
Screen recording is generally straightforward, but there are a few common issues that can trip you up. Here are some of the most common issues and how to troubleshoot them:
- No audio in your recording: Check your screen recording tool’s audio settings and ensure that the correct microphone is selected. If you’re trying to capture system audio, keep in mind that it’s not supported in most built-in apps, but is in Camtasia online.
- Screen recording comes out as a black screen: Some content, especially through streaming services like Netflix, Disney+, or Hulu, cannot be recorded due to Digital Rights Management (DRM) protections. Copyright protections can not and should not be bypassed since it is a legal protection.
- Visual clutter: Tidy up your screen by closing unnecessary apps and windows, turning off notifications, limiting browser tabs, and only recording the area you need.
- Screen video is blurry or low-quality: If your screen recording appears blurry or pixelated, it’s often due to recording at a lower resolution or improper export settings. Most built-in tools capture at 1080p, but if you’re using a 4k monitor, you’ll want to use a tool like Camtasia Editor that provides more control over resolution, export quality, and frame rate.
Crystal-clear screen recording
Why settle for blurry screen content? Camtasia Editor’s screen recorder captures everything at up to 4K!
Free Download
Your screen recording workflow starts here
Now, you know how to record your screen on any platform, which helpful editing tools to use, and common mistakes to avoid. TechSmith’s tools, Camtasia online and Camtasia Editor, are integrated together for a high-quality recording and editing system. They are the best screen recorders to streamline and level up your recording process without being a video editing pro.
Looking for professional screen recording software?
From simple screen captures to polished video editing, TechSmith has everything you need to create professional-quality content.
Learn More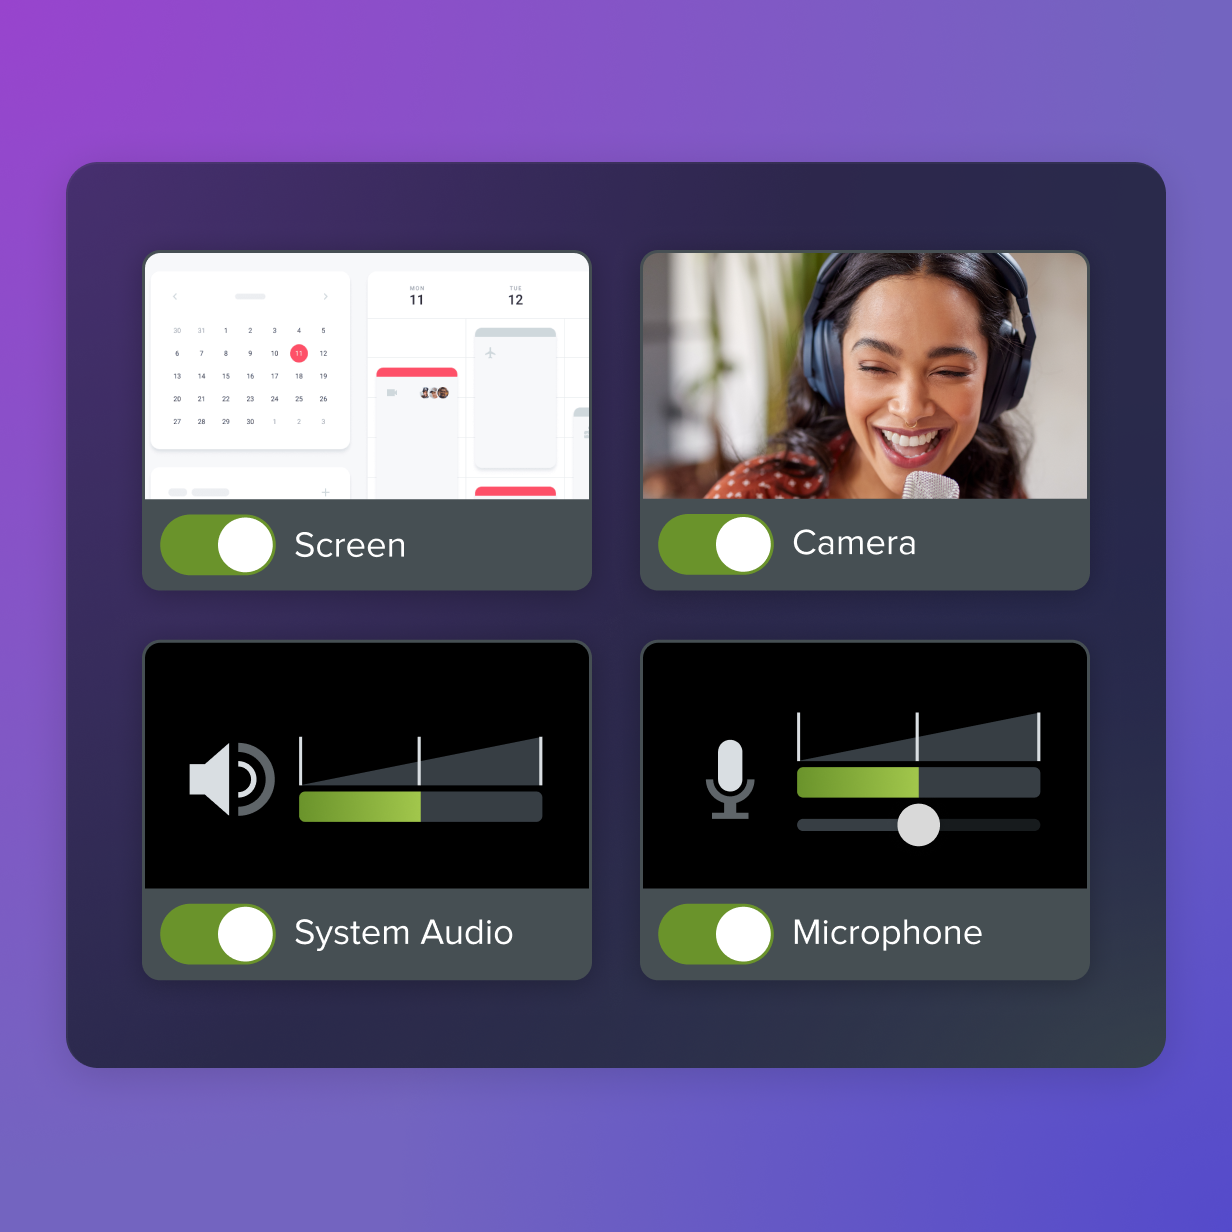
Share